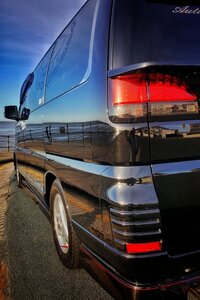
Don’t really matter now as I’ve reversed into another car in broad daylight ..should have my eyes tested... if anyone says” you should had gone to spec savers” I’m not in the mood ...
-
Welcome to the ElgrandOC forum. You will find that the majority of the forum is locked, but do not worry. You can unlock more content by registering to the forum completely free. Sign up is automatic, does not require email confirmation and is instant. Feel free to browse through the sections to see what topics have been covered before you register. You can register for an account by CLICKING HERE Once you have registered, you will unlock more of the forum content. You will not unlock all of the content until you have reached 10 posts. This is to give you an opportunity to chat to existing members and help to integrate you into the forum community. We are a friendly and helpful community and there is a wealth of infomation contained within the forum. Please feel free to register, introduce yourself and get to know your fellow members. Feel free to look at the Frequently Asked Questions section, the Meets/Events section and the Competition Section without having to register. We look forward to getting to know you and help you with any questions or problemd you have with your Elgrand.
You are using an out of date browser. It may not display this or other websites correctly.
You should upgrade or use an alternative browser.
You should upgrade or use an alternative browser.
What have you done to your Elgrand today?
- Thread starter Madfish
- Start date
Brendan1969
BANNED
Glass fibre sheet bond underneath Richard with a good bead of superglue on the break edge. Should do the trick.So today I managed to snap my engine cover shroud in half by trying to refit the airbox intake section!!!!Yes I know I should have removed it first!!! lol
Any ideas how I can fix it other than the norm of superglue! Is there anything else on the market that might help?
View attachment 3487
Don’t really matter now as I’ve reversed into another car in broad daylight ..should have my eyes tested... if anyone says” you should had gone to spec savers” I’m not in the mood ...
Glass fibre sheet bond underneath Richard with a good bead of superglue on the break edge. Should do the trick.
Good idea @Brendan1969 something like this!
Luckily its a very clean break so its not that noticeable when its put back together!
https://www.werkenmetmerken.nl/nl/soudal_polyester_reparatieset/p/475
Brendan1969
BANNED
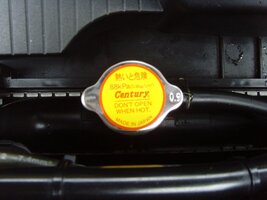
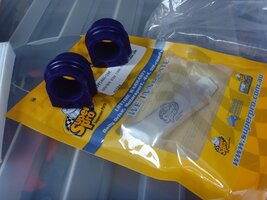
Had mine service washed today by my local valet guy I know so all the dirt and salt is off her now from the snow. Also just bought 2 brand new rear brake calipers, poly ARB bushes and a new rear cabin filter and new rad cap from Brian @ BMR. I will sell my original calipers on ebay as RHS/R is 100% fine and LHS/R is working nowive cleaned it up again.
- Messages
- 185
- Reaction score
- 509
- Points
- 233
- Location
- Medway
- First Name
- Steve
- Elgrand
- E51
- Region
- South East
Gorilla tape on top as a temporary fix. Turn it over and stitch it together with a broad tip soldering iron (plunge and twist motion). Practice with a broken bumper. With a bit of practice you can achieve a high level of finish.So today I managed to snap my engine cover shroud in half by trying to refit the airbox intake section!!!!Yes I know I should have removed it first!!! lol
Any ideas how I can fix it other than the norm of superglue! Is there anything else on the market that might help?
View attachment 3487
I once repaired a badly shattered Honda Gold wing fairing using this method and after painting you couldn't see the repair.
Declan Cullinan
Active Member
- Messages
- 137
- Reaction score
- 172
- Points
- 173
- Location
- Manchester
- First Name
- Declan
- Elgrand
- Looking to buy
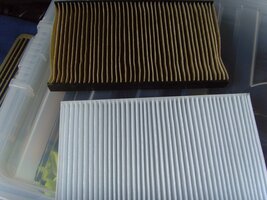
Replaced the front and rear cabin filter with new ones from BMR. Had to trim the rear one down as it was about 15mm longer than the old one and wouldn't fit in the space properly.
Gorilla tape on top as a temporary fix. Turn it over and stitch it together with a broad tip soldering iron (plunge and twist motion). Practice with a broken bumper. With a bit of practice you can achieve a high level of finish.
I once repaired a badly shattered Honda Gold wing fairing using this method and after painting you couldn't see the repair.
Thanks guys for the advice, the plastic for the cover is only round 3mm thick will that still be okay to plastic weld?
- Messages
- 1,355
- Reaction score
- 5,924
- Points
- 333
- Location
- Newport
- First Name
- Craig
- Elgrand
- E51
- Region
- Wales
Gutted to see this!!So today I managed to snap my engine cover shroud in half by trying to refit the airbox intake section!!!!Yes I know I should have removed it first!!! lol
Any ideas how I can fix it other than the norm of superglue! Is there anything else on the market that might help?
View attachment 3487
Try gorilla
Keeps partners mouth shut for hours
Brendan1969
BANNED
I'm off to buy some now then mateGutted to see this!!
Try gorillaglue it solves everything.
Keeps partners mouth shut for hours
Brendan1969
BANNED
Mmmm, I was under the impression Brian had these made specially so they fit OEM like for like thus no trimming required.Replaced the front and rear cabin filter with new ones from BMR. Had to trim the rear one down as it was about 15mm longer than the old one and wouldn't fit in the space properly.
Declan Cullinan
Active Member
- Messages
- 137
- Reaction score
- 172
- Points
- 173
- Location
- Manchester
- First Name
- Declan
- Elgrand
- Looking to buy
So was i, but it wouldn't fit for 2 reasons :Mmmm, I was under the impression Brian had these made specially so they fit OEM like for like thus no trimming required.
1. When side by side the replacement was 15mm (ish) longer than the Nissan original
2. The Nissan filter has really flexible edges and is easy to bend to get it in, the replacement is relatively stiff so it's slightly more tricky to get in.
Once trimmed though, it was fine.
Brendan1969
BANNED
I rang Brian @ BMR today to discuss this issue and he will liase with his supplier again regarding final like for like size. Ive fitted mine today after Brian guided me over the blower and its fine and I did not need to trim it eitherSo was i, but it wouldn't fit for 2 reasons :
1. When side by side the replacement was 15mm (ish) longer than the Nissan original
2. The Nissan filter has really flexible edges and is easy to bend to get it in, the replacement is relatively stiff so it's slightly more tricky to get in.
Once trimmed though, it was fine.
- Messages
- 51
- Reaction score
- 71
- Points
- 138
- Location
- redditch
- First Name
- neil
- Elgrand
- E50
- Region
- Midlands
also swapped the rear speakers.cheats method as described elsewhere on here.took about an hour .cba to remove seats etc .fli 6 in same as the front so sounds way better now too
- Messages
- 26
- Reaction score
- 33
- Points
- 78
- Location
- Lowestoft Suffolk NR33 7AR
- First Name
- Kevin
- Elgrand
- E51
- Region
- East Anglia
yesterday new rear brake pads 4 new tyres repaired leaking rear near side coolant new hose clips to day replaced fuse for cigarette lighter cleaned Bessie fuelled petrol and LPG all clothes and gear on board for a week away before Easter rush up north Norfolk OH and 2 bottles of red and a case of beer !! ENJOY !!!!
Banned For Life
BANNED
It's so shiny the reflections make it look dirty 

Fantastic job as usual.
Fantastic job as usual.


