I've been bothered by the drivers side wingmirror indicator lens since I got my car 2 years ago.
When its wet or washed the indicator light filled up with water. Whilst it still worked, I could see the broken bit of glass (or hard plastic) sitting inside out of reach

My initial hope was to get the thing apart and glue the part inside - easy

So taking the mirror off the car would help
The cover panel unclips easily
But then the door card needs to come off so you can unplug the electrics
Take out the electric window switch housing
Remember the screw that lies beneath a little cover inside the openning handle
Door card off, you can now unplug the electrical connections, there are two of them
Off course now you realise if you had wound the window down, it would make life much easier to hold the wing mirror as you take out the three or so bolts that hold it on :-( You'll need to put the electric window switches back again for this.
So wing mirror off, you can peal away the plastic cover that acts as a cushion agains the car when the bolts are done up tight
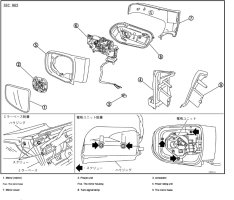
Take off a whole load of screws and snap off various plastic tabs to realise there is no easy way into this thing.
Then realise the main plastic body of the unit has a double shell, the outer one (which has the light unit inset) is held to the inner with double sided foam tape.
Prise the two apart carefully with whatever you are not suposed to use in the kitchen
The outer shell then you can see has the light unit inset and held with more sticky tape
This light unit is sealed and the lens doesn't come off - bugger :-(
So I figured if I made the openning a bit larger, I could retrieve the broken piece inside and then glue all back together. I cut into the unti with a dremel diamond disc, a little rough for this job so not great
I snapped off this tab and kept it safe. Washed out the inside of the lense and only just caught the broken bit before it went down the drain. I tried allowing the thing to dry overnight on a radiator but it took several minutes of hairdryer heat to remove most of the mositure inside the light.
I preped the edges of the repair and rough wet and dried the whole lens with bits from a headlight lens refurb kit
I didn't want to use superglue as I expected the nasty yellowing over time would look naff. I tried intitially to use the fluid from windscreen chip repair kit as a glue. This stuff is very thin and takes too long to set - back to the drawing board.
I found this stuff when searching net for ideas
It's basically a light cured resin supplied with it's own little dinky curing light ( I used to be a dentist so the technology is familiar but a lot cheaper!)
I bonded the pieces back together one at a time after cleaning with an alcohol swab
The final bond was reinforced in layers
I smoothed over everything with a dremel sandpaper drum followed by more wet and dry
The plastic parts were cleaned and sandwiched back together with automotive sealant in black.
The final result was good and bad
I was dissapointed (but not surprised) that the crack showed up so much, I guess you can't avoid the way light will be reflected by a repair. I was pleased though that despite how it looks, when you run your finger over the repair, it is so smooth you can barely feel it. The indicator lights now no longer work but is that something else? did they ever work before? Come on, it's an Elgrand . . . never straightforward ;-)
Lessons? Well I shouldn't have thought it was going to be easy. Bondic is amazing stuff and can be filed and sanded within seconds producing a pretty clear repair.


 thanks in advance