• Welcome to the ElgrandOC forum.

    You will find that the majority of the forum is locked, but do not worry. You can unlock more content by registering to the forum completely free. Sign up is automatic, does not require email confirmation and is instant. Feel free to browse through the sections to see what topics have been covered before you register.
    You can register for an account by CLICKING HERE

    Once you have registered, you will unlock more of the forum content. You will not unlock all of the content until you have reached 10 posts. This is to give you an opportunity to chat to existing members and help to integrate you into the forum community.
    We are a friendly and helpful community and there is a wealth of infomation contained within the forum. Please feel free to register, introduce yourself and get to know your fellow members.

    Feel free to look at the Frequently Asked Questions section, the Meets/Events section and the Competition Section without having to register.
    We look forward to getting to know you and help you with any questions or problemd you have with your Elgrand.
Best Modification - 2018

Status
Not open for further replies.
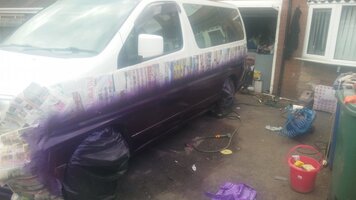
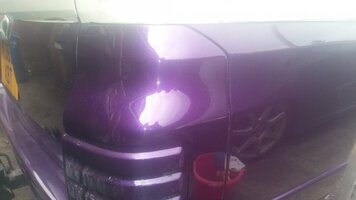
My mod was whole outside and colour change with kit replacement... this is still ongoing project as funds and time will allow20180714_115533.jpg

20180713_150734.jpg
 
Last edited by a moderator:
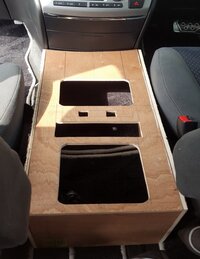
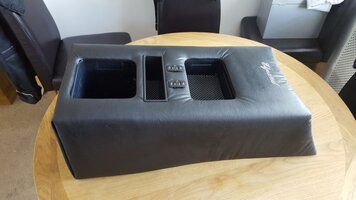
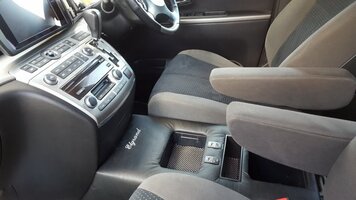
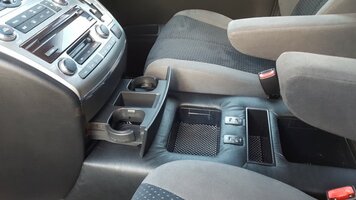
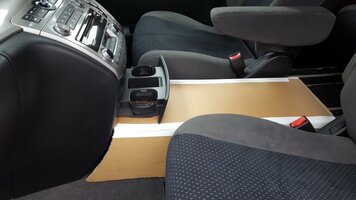
Custom centre console.
Carboard template made.
20180413_114030.jpg
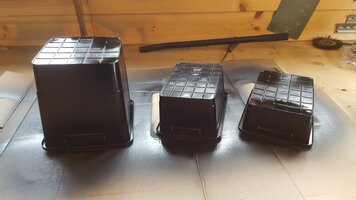
Plastic food containers used to keep the cost down.
Sprayed black on the outside so they don't scratch when you put stuff in them.
20180418_123838.jpg
Template transferred to plywood and made up.
1.jpg
Wrapped in wadding and leatherette using glue and a staple gun.
Boxes and usb ports attached with hot glue.
20180422_160816.jpg
A little embroidery magic from the wife.
Usb's wired to an ignition live from the rear of the cigarette lighter.
Fitted into position.
It can be removed easily as its free standing and the cables are on Bullet connectors.
20180422_181248.jpg
20180422_182049.jpg
 
Last edited:
Main mod20180615_171341.jpg
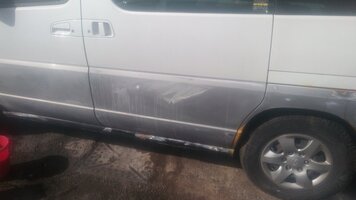
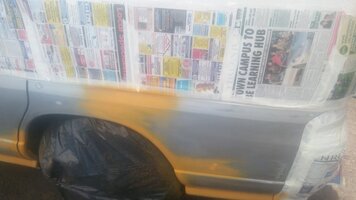
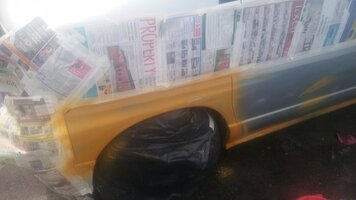
Painting the lower half of the van
Lots of sanding welding and prep.its not perfect but its all my own work
Items used
Air da with different grade sanding pads
Welder filler sanding blocks
2 pack primer
Filler primer
Black guide coat
Viking purple base
Jowels paints hi gloss laquer
Blue metal flake
And lots and lots of time20180615_090612.jpg20180615_090612.jpg20180615_135628.jpg20180615_135643.jpg20180620_185604.jpglooks better in the sun but ill let you all decide when you see it at JAE. Let my know there what you think any a
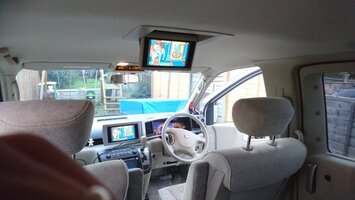
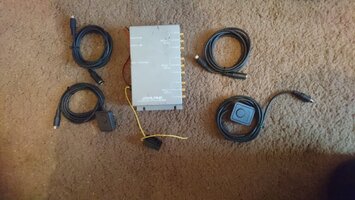
 
My most useful mod to any of my cars so far is the multi zone multi media. Most useful becuase it means peaceful journeys when the kids start getting bored!

DSC_0066.JPGDSC_0062.JPG

There's a Raspberry Pi and an alpine media selector meaning the kids canwatch Peppa pig in the back while we listen to music in the front,bliss!
 
I've done numerous mods over the 3years of ownership,LPG conversion, Propex gas heater, and a captive gas cylinder sits where the rear Aircon and heater unit once sat to supply the heater and hob, and is filled form the LPG filler point, front suspension upgrade heavy duty coils rear air suspension camper conversion ,all my own work, rear kitchen pod with sink running water, 2burner hob, waeco absorption fridge and a table 2 seat boxes over the wheel arches which give me storage a middle seat conversion which again gives storage it's cable of facing forward to carry 2 passengers and facing rearwards so upto 6 people can use the table (although a little squashed) and then reclining to make a 6ft 6inch X 5ft double bed, I've made a two tier storage unit which fits between the 2 front seats and still allows for the use of the 2 pull out drawers, battery to battery and a 150 watt solar panel controlled by a 20 amp mppt solar charger controller to charge a 130amp AMG leisure battery that runs 12volt electrics led lights phone chargers 12volt shower attachment and of course the fridge, cargo nets attached to the ceiling give storage a poptop which gives me standing room and another berth I had a front facing window put in and I believe the company thought so highly of this modification that they now offer it to customers, I've fitted 2 awning rails ( 1 each side) alongside and under the edge of the poptop to attach a sun canopy and or my airbeam awning, a builders pipe rack to carry my fishing rods in also a rear awning fits over the tailgate, a Thule cycle rack gives me extra carrying capacity skinny spare wheel bike and a huge box which holds my kayak among other things when on long trips,4 new Yokohama delivery star 8 ply tyres were fitted prior to my trip, I'm on an adventure of a lifetime, 4700 miles and 12 countries so far, currently in Turkey on the Mediterranean coast,
 

Attachments

  • IMG_20180721_174727.jpg
    IMG_20180721_174727.jpg
    106.5 KB · Views: 111
  • IMG_20180721_174705.jpg
    IMG_20180721_174705.jpg
    80.5 KB · Views: 122
  • IMG_20180721_174621.jpg
    IMG_20180721_174621.jpg
    67.1 KB · Views: 133
  • IMG_20180721_174511.jpg
    IMG_20180721_174511.jpg
    77.9 KB · Views: 143
  • IMG_20180721_174432.jpg
    IMG_20180721_174432.jpg
    100.4 KB · Views: 140
  • IMG_20180716_204038.jpg
    IMG_20180716_204038.jpg
    76.1 KB · Views: 138
Last edited:
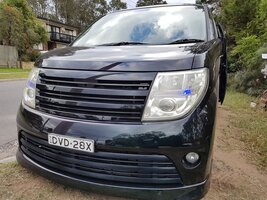
Blacking out front grills

Looks much meaner and gets lots of comments

Live the change

Matt black plasti dip

Rear chrome needs to go as well as tinting rear lights....all black here we come

Before
FB_IMG_1532201822215.jpg

AfterFB_IMG_1532201825396.jpg
 
I've owned the van for about 2 months now, but I've done all of these mods in the last few weeks, mostly at night so sorry in advance for lack of photos or crappy photos haha.

Blue LED parking lights.
1.jpg


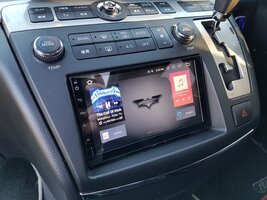
Installed a new Xtrons TE706PL head unit with new fascia. Think i'll wrap the rest of the dash matt black to match the new fascia.

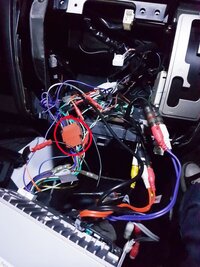
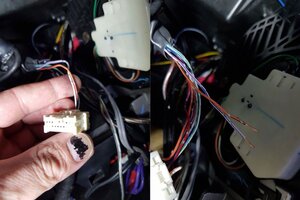
There wasn't much room behind the unit so I cut out the ISO adapters, shortened the wires and soldered them.2.jpg

And here are are the 2 wires needed for the steering wheel controls.
2bb.jpg

And the finished product :)
2c.jpg

More in next post...
 
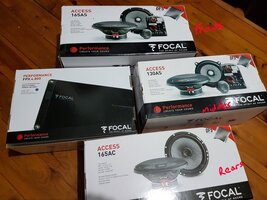
The new speakers and power amp...
3.jpg

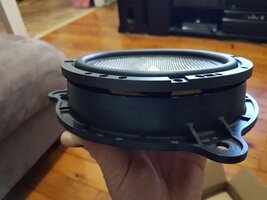
I first tried to cut out the previous speaker but the new ones would't quite fit.
4.jpg

I bought standard Nissan speaker rings from the local car audio shop and they're perfect.
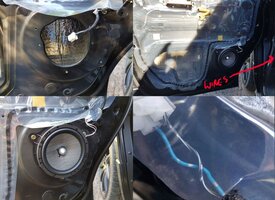
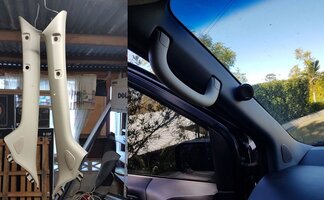
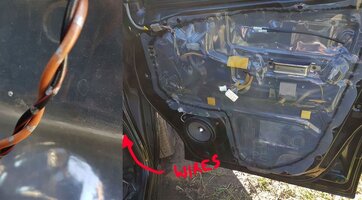
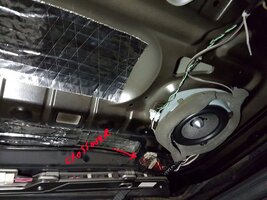
The front doors don't have grommets for the wires to run into the doors, they have a lever action plug, and there was no room for the tweeters anywhere else on the door. I decided to install the crossovers under the passenger seat with velcro. First I had to find the blue and black wires (about where the arrow is pointing) and join them and run them to the crossover, and connect the other end to the woofer. Focal recommends the passenger side tweeter face the drivers head, and the drivers side tweeter face the passengers head, so the pillar seemed like the place to install them, after a coat of charcoal paint (the beige was too noticable from the outside).
5a.jpg

8b.jpg

Same deal with the drivers side but the wires are black/red and orange. These speakers had about another 20mm clearance behind them.
9a.jpg

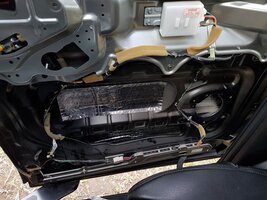
Rear sliding doors were surprisingly easy, even in the dark. Just release the split pin from behind the handle (someone on this forum has posted pics on this procedure) and then just pull the whole door card off. I removed the steps but I don't think it was necessary. 5.25" were a direct fit. I placed the crossovers for these speakers under the woofer, and the tweeters on the pillar about a foot above the door handle (sorry, no pics of this yet). I forgot to mention before lay as much sound deadening as you can.
11.jpg

12.jpg

More to come...
 
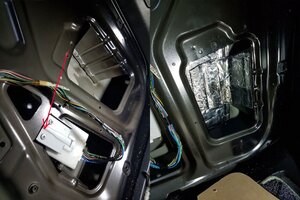
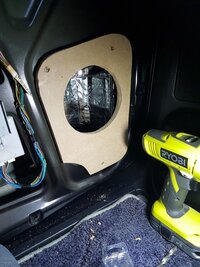
For the tailgate I pulled the door card off and noticed there is an odd shaped hole on each side, but on had some electronic thingy in it, so first step was to move it over to the next hole, then apply sound deadening.
14a.jpg

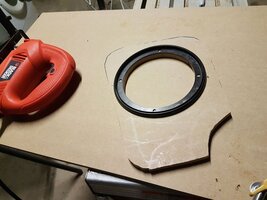
Then I got some cardboard and made a template for the hole, then traced it onto 12mm MDF and traced a round hole with the speaker ring. Then I cut two out with a jigsaw and screwed them into place.
13.jpg

16.jpg

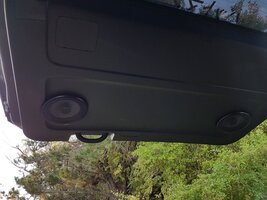
Then I put the door card back on and drilled some large holes so I could see the edges of the MDF behind the door card. Then used shears and a Dremel to cut a neater circle for the speakers to fit in (sorry, no photos again).
17.jpg


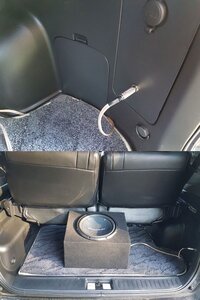
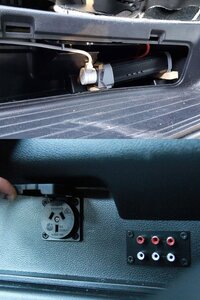
I then ran heavier gauge wire from the driver seat (where the amp is) to the rear cigarette lighter panel and installed a 6.5mm headphone jack which is connected to the subwoofer outputs. This way I can completely remove the sub without having wires and shit everywhere ;)
18a.jpg

And I chucked on a few Focal badges for good measure lol
 

Attachments

  • 20.jpg
    20.jpg
    157.8 KB · Views: 13
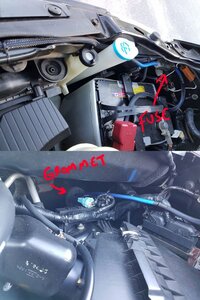
I then ran the 4 gauge amp power wire around the front of the bonnet (it already had heat shield braiding on the first section) and through the large rubber grommet on the passenger side.
21a.jpg

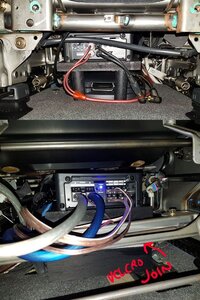
Next was the arduous task of fitting the power amp under the drivers seat. I made a kind of a table from 12mm MDF, with dowel legs for the rear so the under-seat air vents weren't affected, and the front was 2 pieces of 30mmx50mm pine joined with velcro. I had to do the front in 2 parts as the "table" would't fit over the air vent @ 100mm high, but 50mm would just squeeze over. The legs are also velcroed to the carpet.
23a.jpg

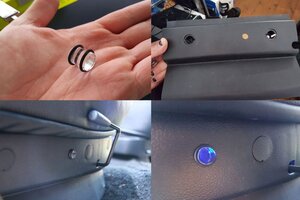
I wanted to see the power light to ensure it was powering off properly, so I found one of my old 12mm clear acrylic ear plugs, drilled a 12mm hole in the front of the seat and squeezed the ear stretcher into the hole and put the O-rings on and it lights up perfectly :)
25a.jpg

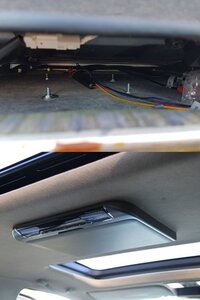
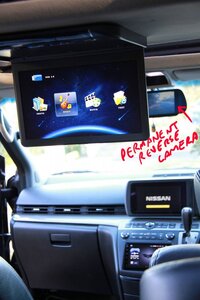
Installing the roof mount monitor was pretty easy. I went with an Xtrons 13.3" non dvd model as it was the thinnest one which still had speakers, IR headphones and FM output. At the moment it's just bolted to the roof lining, but I'm going to make a proper bracket for it when I have the time.
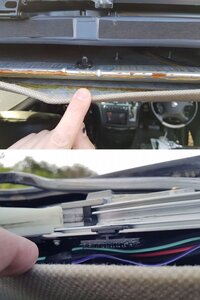
I'm not sure what the previous owners had done in the roof, but they'd broken the clips off and tried to glue it. It looks like it was done a very long time ago lol. I reglued with T-Rex and I t seems to be solid.
28a.jpg
As you can see above the roof lining is held by some sort of really grippy plastic velcro.

29a.jpg
 
I them installed a 400w power inverter in the drivers cubby hole. I simply spliced the positive to the amp power and screwed the earth directly into the chassis. I then cut the end off an extension cord and ran it to the back and installed a caravan power point (my van didn't come with an inverter).
I had a PS4 Pro running the whole trip for 1800km through the roof monitor and it was great!
I also installed those RCA plugs as mine only had a AVC14 lead.
89a.jpg

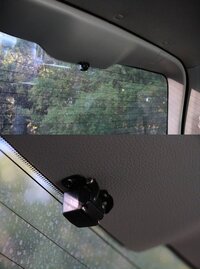
I Installed a second reverse camera and hooked up to a mirror monitor so I could still see behind me when the roof screen was down.
91a.jpg

93a.jpg


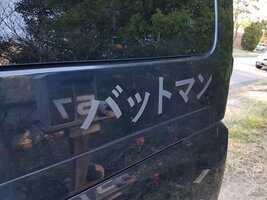
And the last thing for the moment, vinyl stickers that I made at work that say Batman in Japanese. Well, it actually translates to "Battoman" haha :p
94.jpg
 
Main modView attachment 6876
Painting the lower half of the van
Lots of sanding welding and prep.its not perfect but its all my own work
Items used
Air da with different grade sanding pads
Welder filler sanding blocks
2 pack primer
Filler primer
Black guide coat
Viking purple base
Jowels paints hi gloss laquer
Blue metal flake
And lots and lots of timeView attachment 6873View attachment 6873View attachment 6874View attachment 6875View attachment 6877looks better in the sun but ill let you all decide when you see it at JAE. Let my know there what you think any a
Brilliant!
 
My most useful mod to any of my cars so far is the multi zone multi media. Most useful becuase it means peaceful journeys when the kids start getting bored!

View attachment 6897View attachment 6898

There's a Raspberry Pi and an alpine media selector meaning the kids canwatch Peppa pig in the back while we listen to music in the front,bliss!
Instructions please! :)
 
K&N filter
Double din
Braided break lines
Painted blue Nissan badge
Rear vinyl yet to put on..
Nismo stainless steel back box exhaust
LED lights in foot well (forgot to take a photo)
Intake resonator delete
37864280_1767313736680282_305540601888112640_n.jpg37922087_1767312260013763_7541484047994716160_n.jpg37830486_1767312010013788_1892153090702835712_n.jpg37892057_1767311973347125_8908407134257938432_n.jpg
 
Unofficial England Supporters Elgrand
It was fun whilst it lasted 🏴󠁧󠁢󠁥󠁮󠁧󠁿⚽🏠🙈😥
w1a451.jpg
[/IMG]
10gz1xx.jpg
[/IMG]
2cp3zpd.jpg
[/IMG]
2afnbpc.jpg
[/IMG]
 
Status
Not open for further replies.
Back
Top